Introduction
Gong revenue platform can be enriched with customer data, including Deals, Accounts and Leads etc ,from your data warehouse. This guide will help you set up a connection between your data warehouse and Gong.Gong Configuration
To use the CRM API through valmi.io, you need to create an API key. To create an API key, follow the steps below:- Go to
Company Settingsand ChooseAPIunder Ecosystem Group. If you are already logged in, You can also try with this url.https://us-68970.app.gong.io/company/api-authentication?currentTab=MY_API_TAB - Click on
Get API Keybutton. - Keep the
Access KeyandAccess Key Secrethandy. You will need these to configure the Gong connection on valmi.io.
Generic CRM integrated in Gong, instead of the SaaS integrations. To create a Generic CRM, follow the steps below:
- The following http Query needs to be executed to create a Generic CRM. Use the
access_keyandaccess_key_secretcopied above to generate the Basic Auth header. Please refer tohttps://us-68970.app.gong.io/settings/api/documentation#put-/v2/crm/integrationsto register a Generic CRM integration.
Creating a Gong Connection on valmi.io
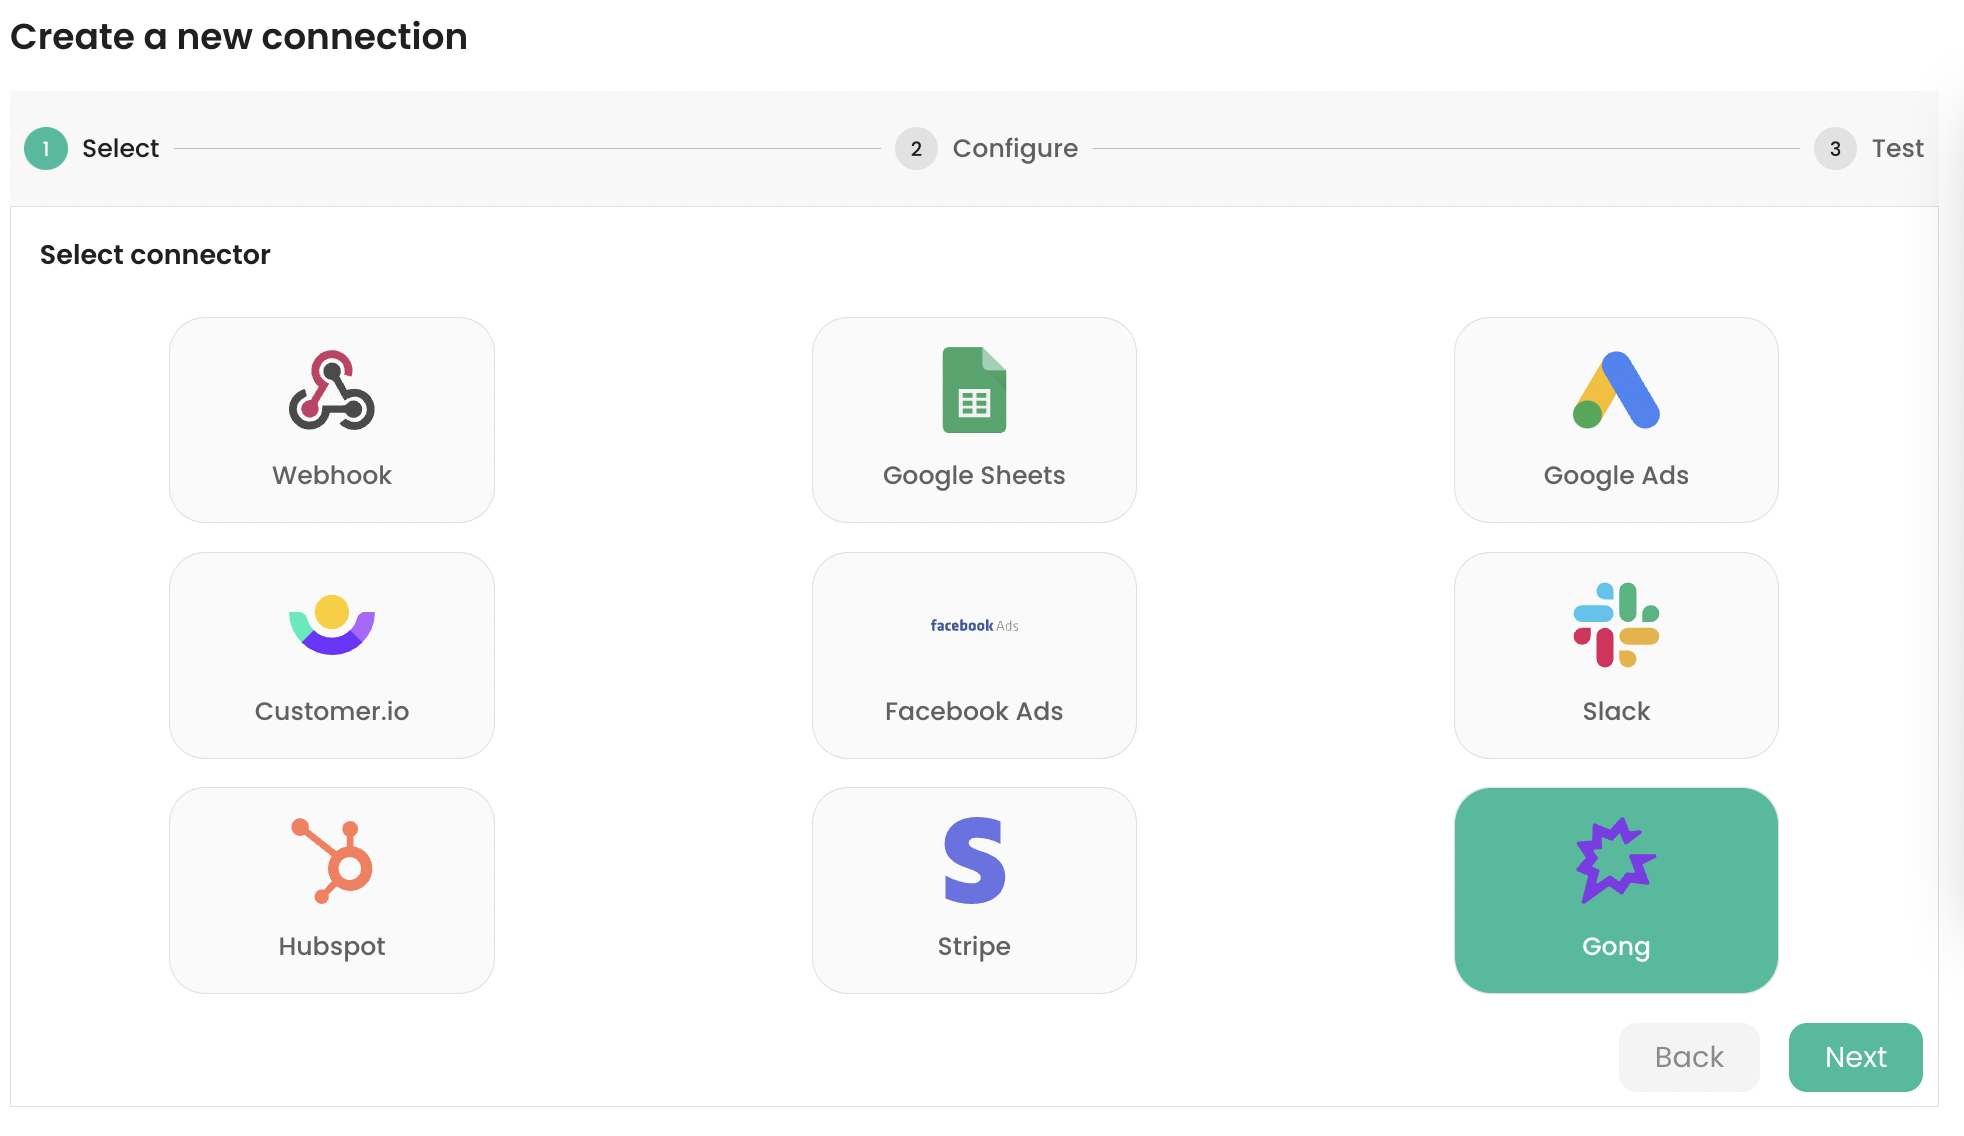
Go to destinations on valmi.io and create a new destination. SelectGong as the destination.
andaccess_key_secret` generated in the steps above. The picture below shows Gong secrets entered into the text fields. Click on the Next button to connect to the Gong API, test the connection, and create it.

Setting up a Sync
-
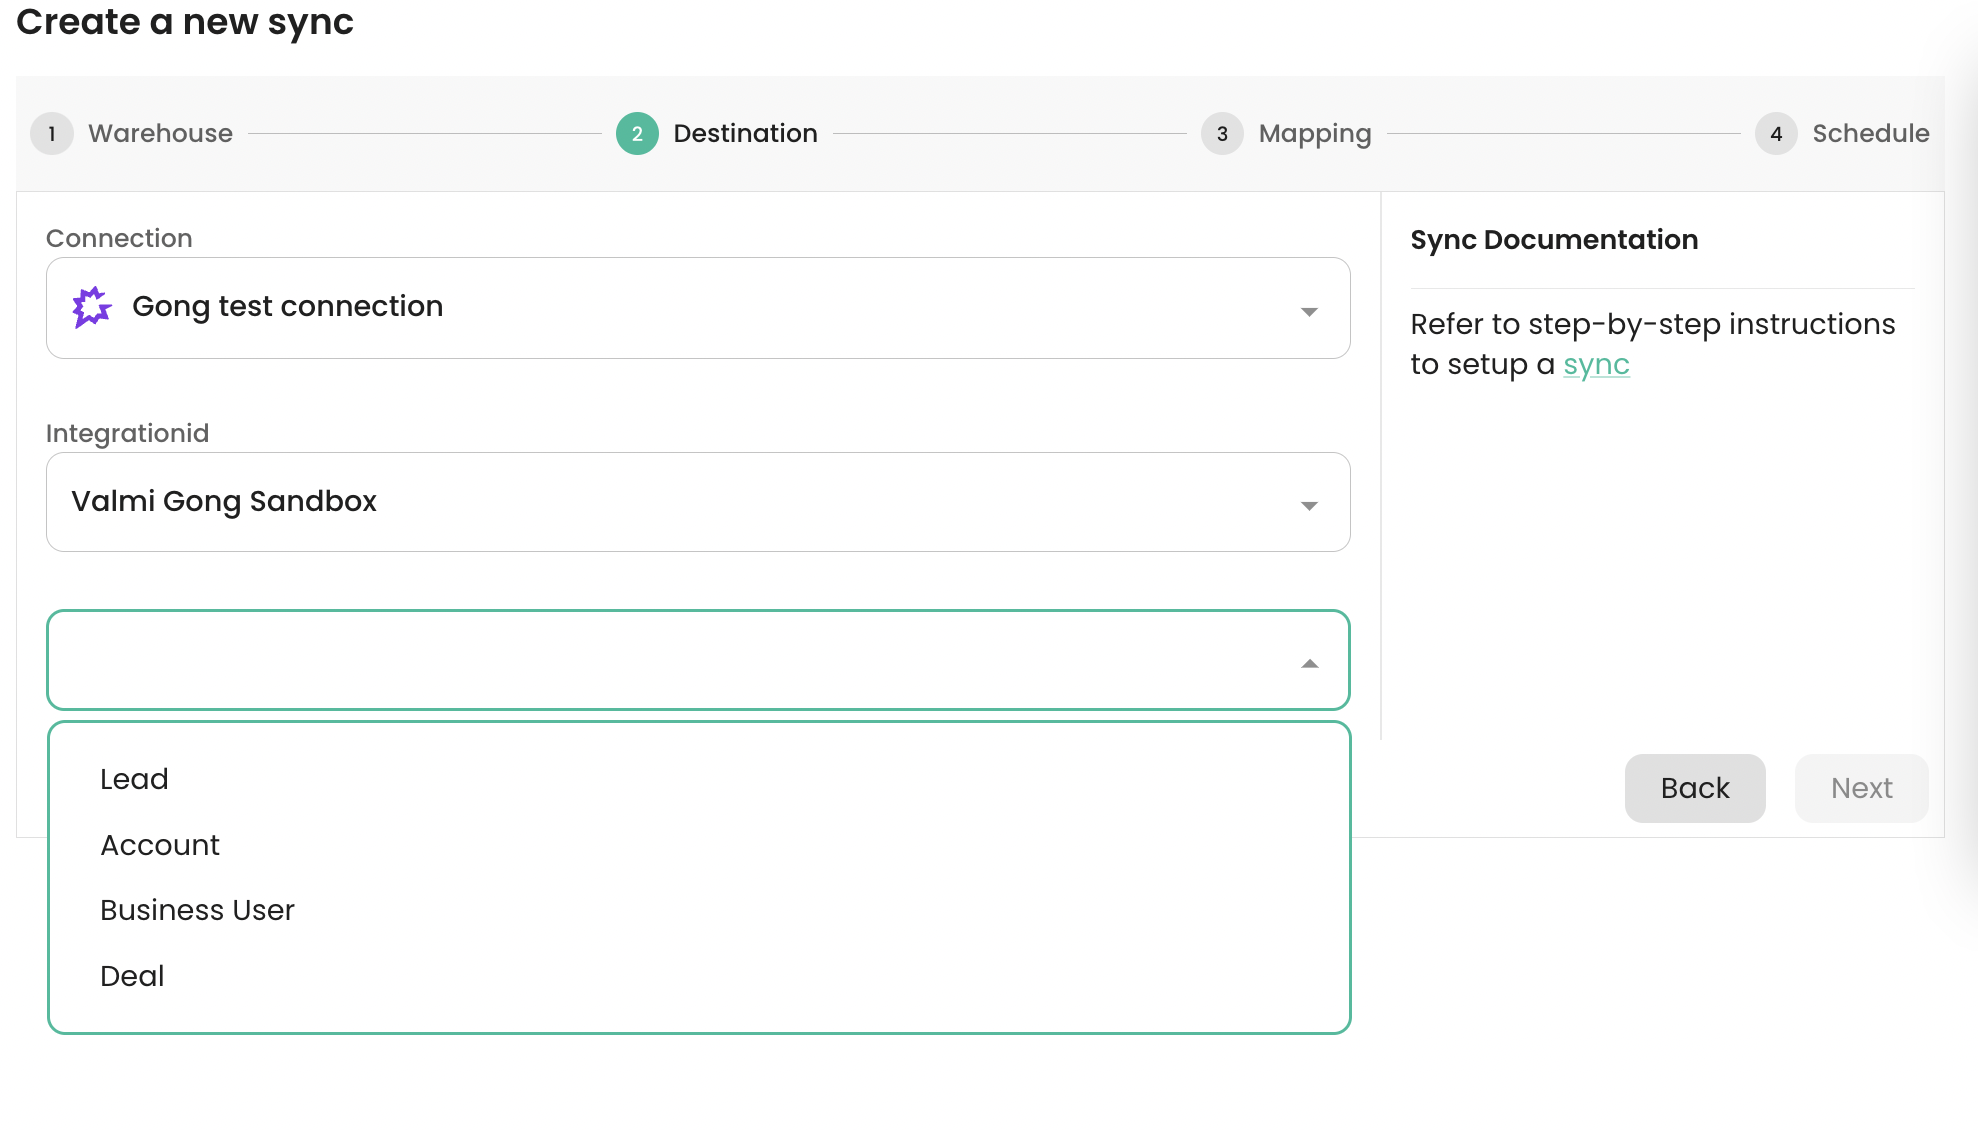
Supported Destination Modes
| Gong Object | Upsert | Update |
|---|---|---|
| LEAD | ✅ | ✅ |
| ACCOUNT | ✅ | ✅ |
| BUSINESS_USER | ✅ | ✅ |
| DEAL | ✅ | ✅ |
-
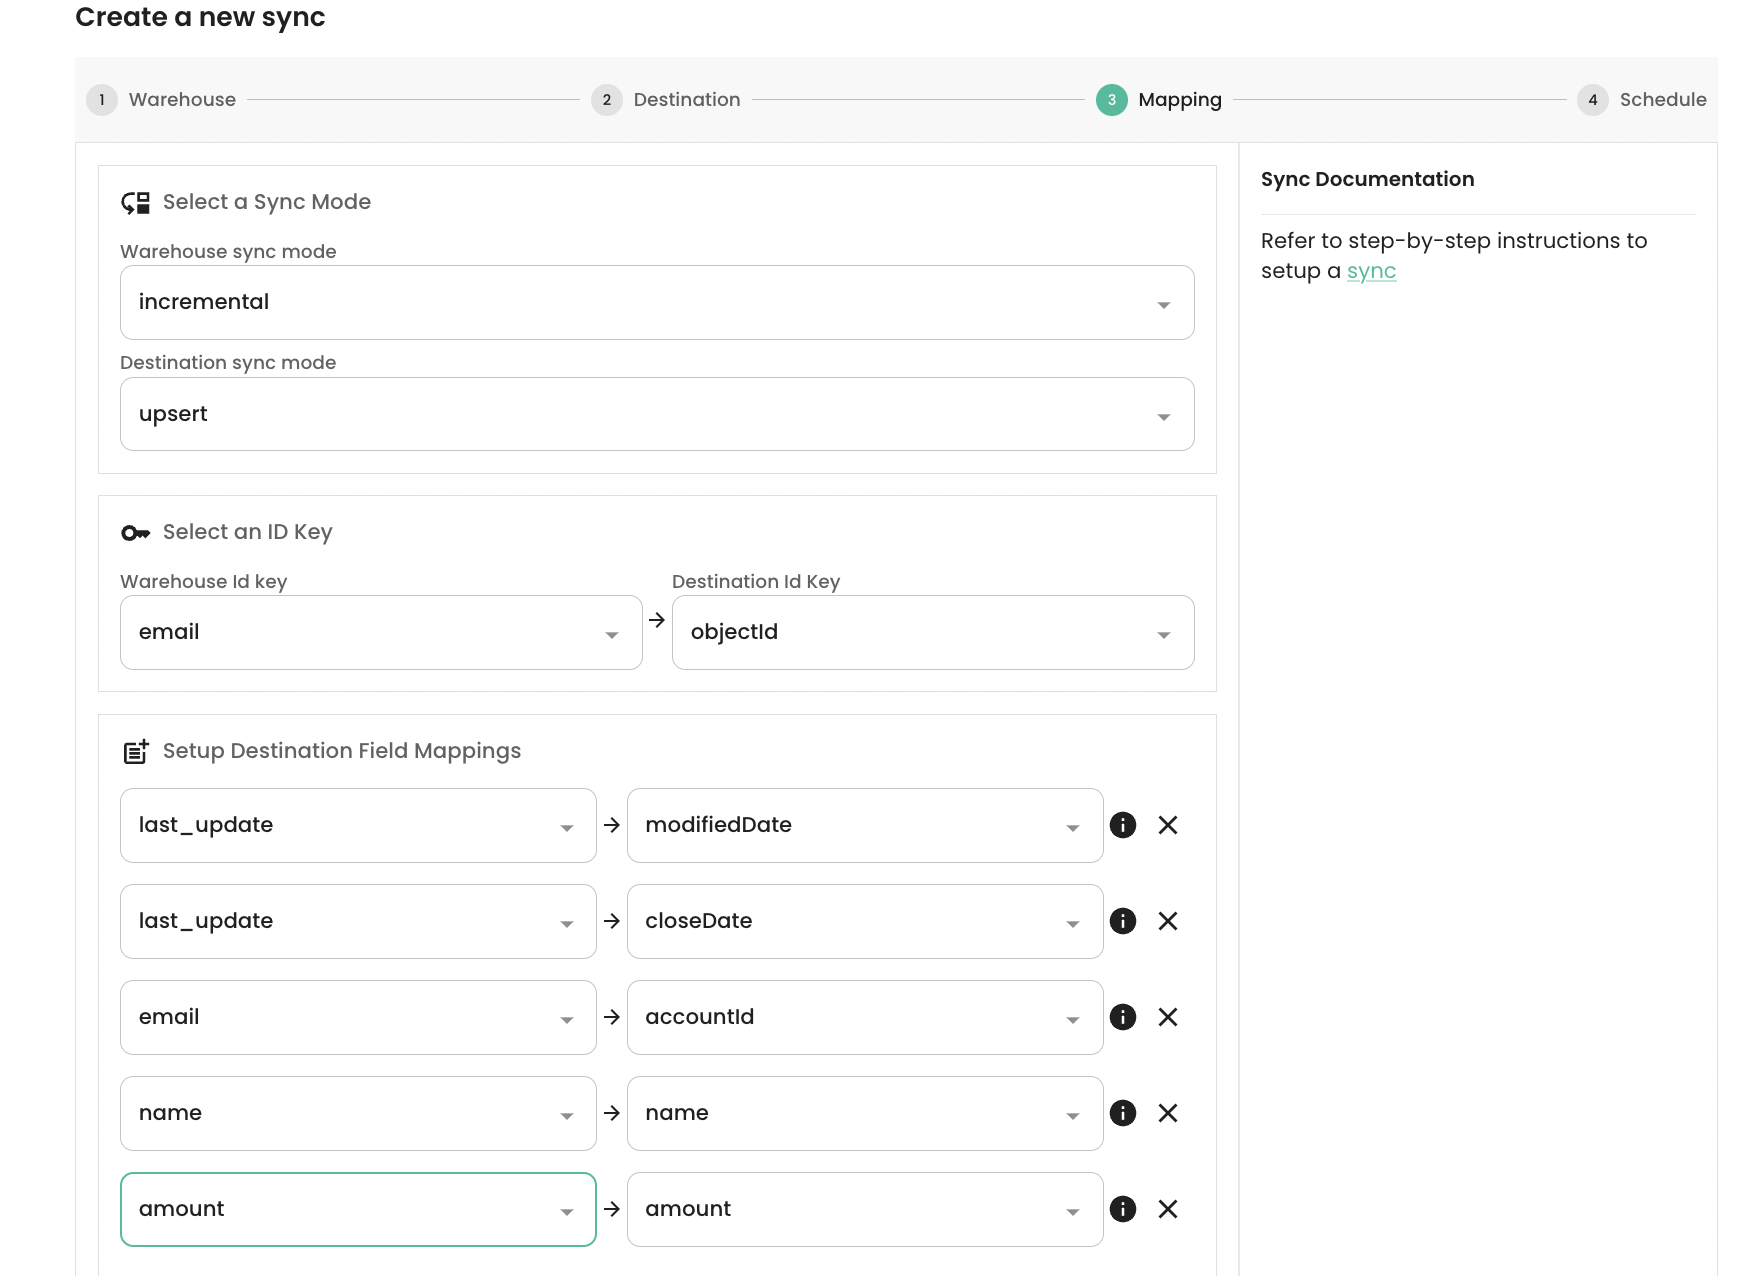
Mapping Source Columns to Destination Fields
DEAL object for this example. The next screen lets the user map the source columns onto the fields of the Gong object. Fields such as objectId and modifiedDate are mandatory. The picture below shows that we have selected Upsert destination sync mode. email has been selected as the Primary Key for the Warehouse source. The source fields last_update, email, name, amount, last_update have been mapped to the destination fields modifiedDate, accountId, name, amount, closeDate respectively.
-
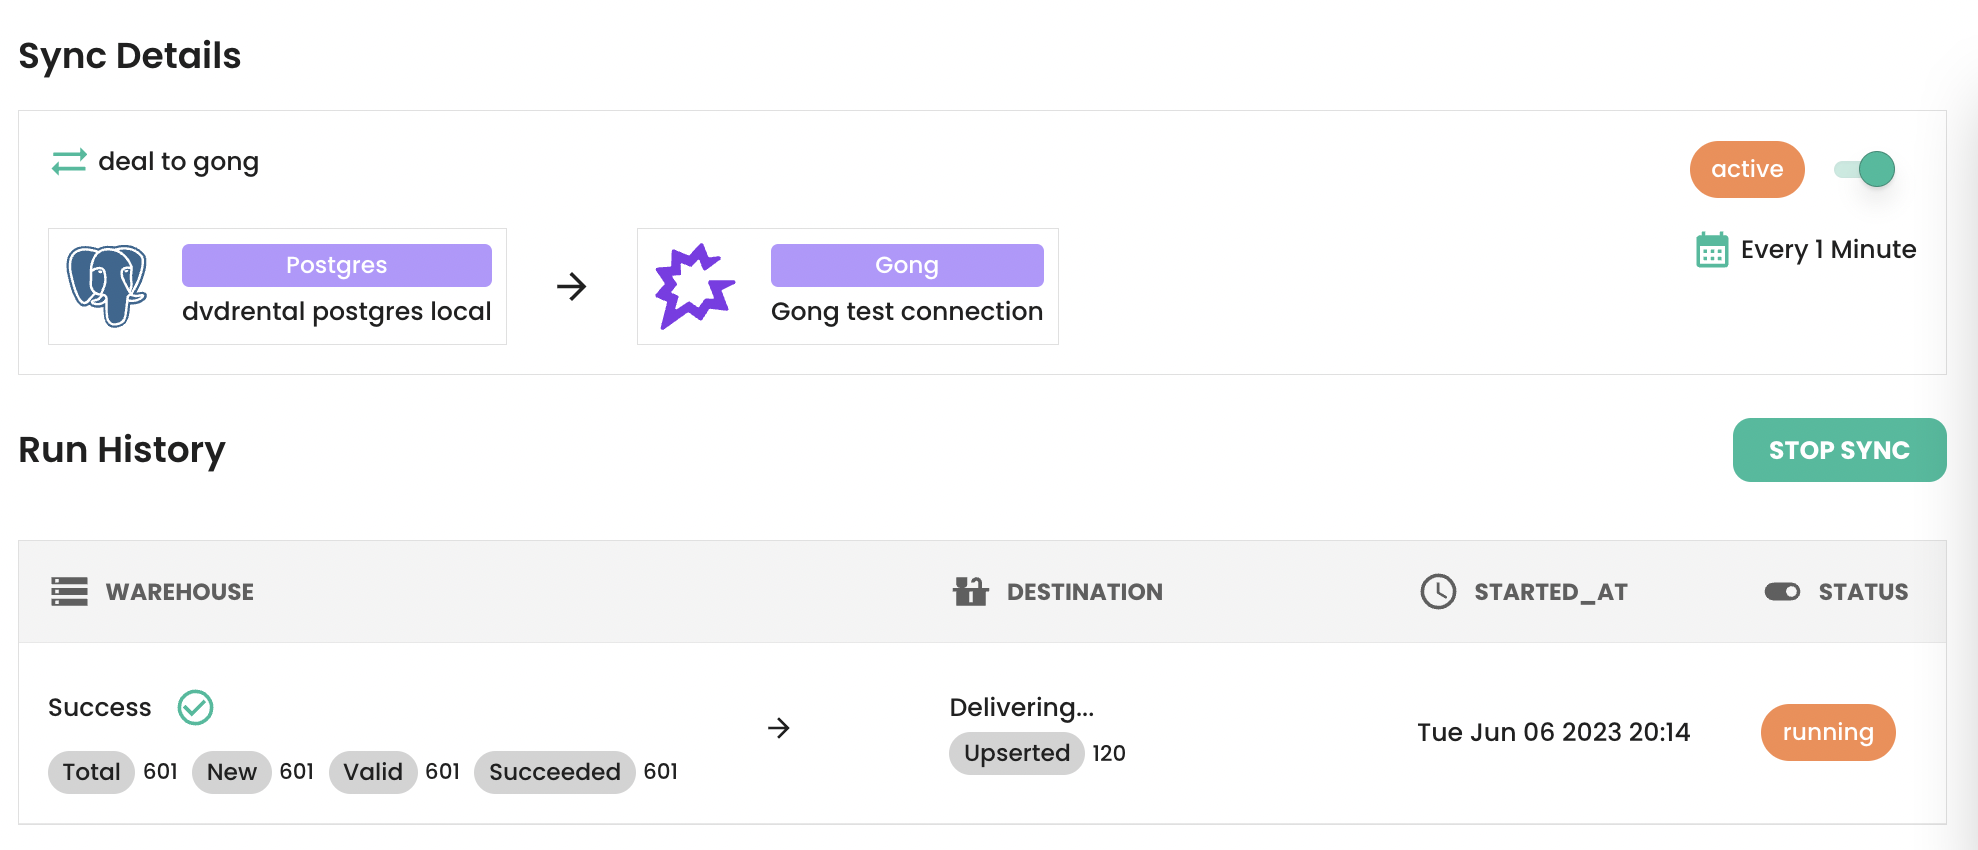
Verifying data loaded into Gong