Introduction
The following documentation provides a step-by-step guide for establishing an Amazon Redshift connection and utilizing valmi.io to synchronize data from a Redshift database to any of the supported destinations.Redshift Configuration
Required Permissions
To optimize data retrieval and transfer between tables in your database and supported destinations, valmi.io employs a “diff” calculation method to identify changes during each update. This approach minimizes the impact on your database’s performance and other applications’ APIs. As part of this process, valmi.io manages a set of tables in a designated bookkeeping schema, typically consisting of 2 or 3 tables per sync job. To establish a successful connection with your Redshift database, it is advisable to create a dedicated user account specifically for valmi.io. This account should have a strong and unique password and will be used for authentication by valmi.io. To ensure smooth operation, the valmi account should be granted the following permissions:- Full administrative access to all tables within the bookkeeping schema, including the ability to create, delete, read from, and write to these tables.
- Read-only access to any tables and views in the desired schema that you want valmi.io to publish to your service destinations.
If you face any connection issues or unlisted tables or views, please make sure the following script is run by a user with the required permissions to create users, schemas, and grant permissions.
Creating a Redshift Connection on valmi.io
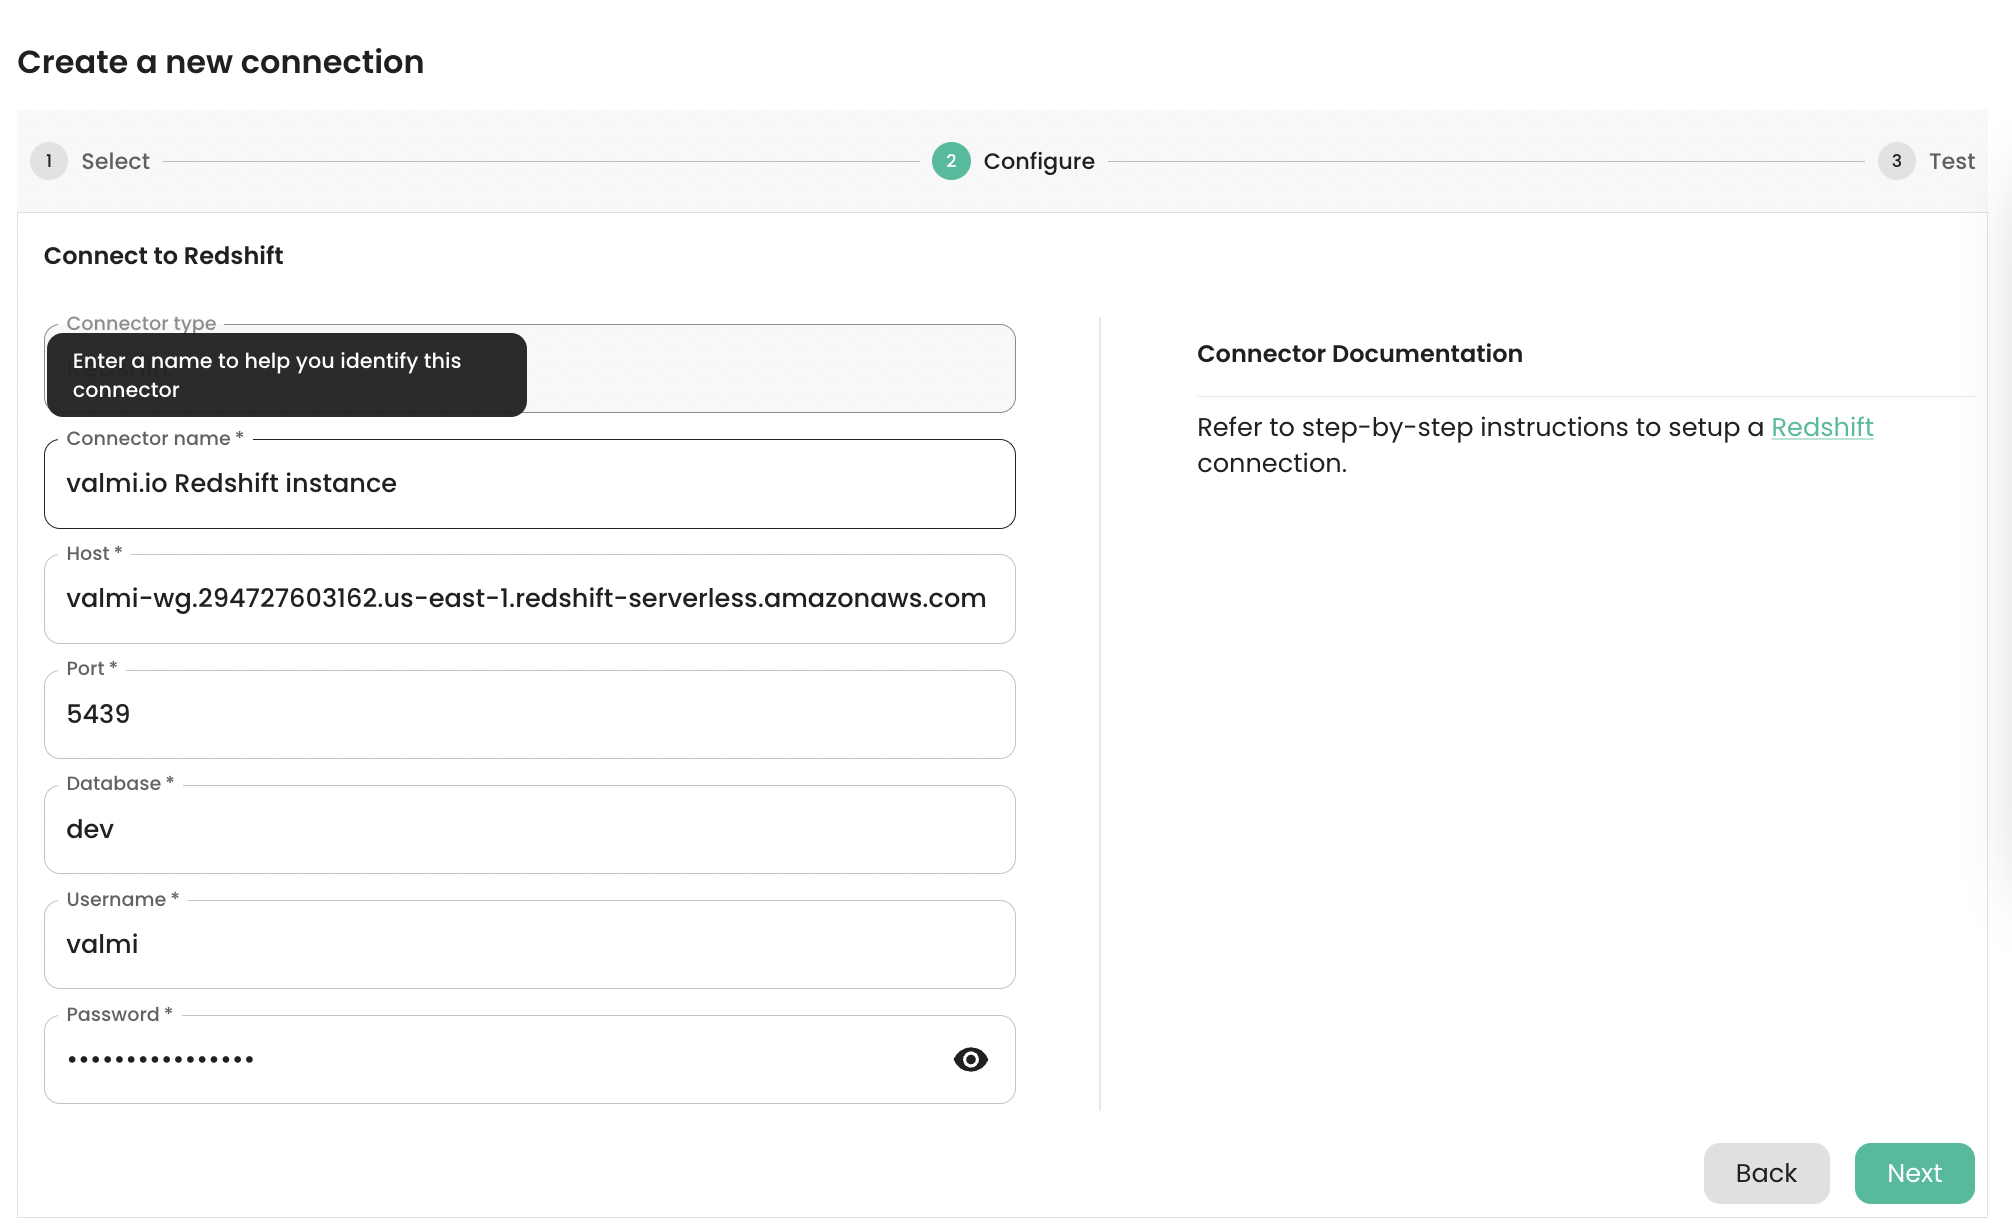
The picture below shows the configuration page for a Redshift connection. The following fields are required:- Connection Name - A name for the connection.
- Host - The hostname of the Redshift warehouse. For instance, it looks similar to
valmi-wg.294727603162.us-east-1.redshift-serverless.amazonaws.comfor Redshift Serverless. - Port - The port number of the Redshift warehouse. The default port is
5439. - Database - The name of the database to connect to.
- Username - The username to use to connect to the database.
- Password - The password to use to connect to the database.

Setting up a Sync
-
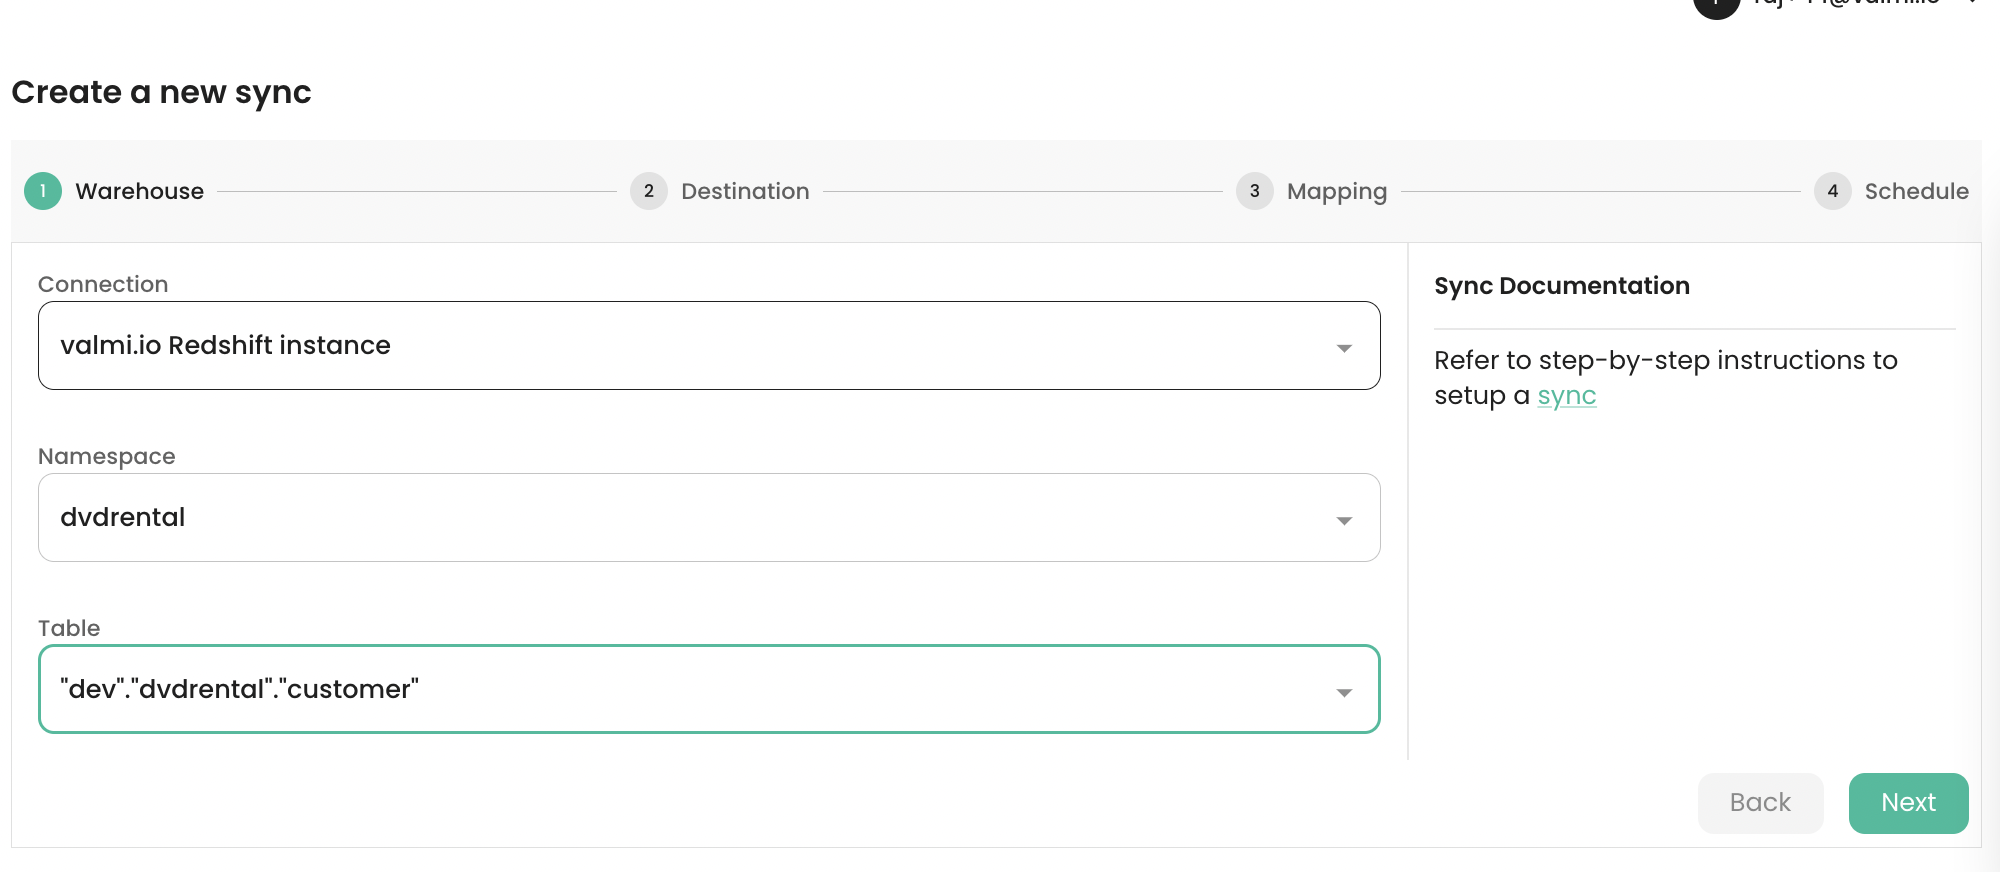
Selecting a table or a view to Sync
- Select the Redshift connection you created earlier.
- Select a namespace.
- Select a database table or a view.
-
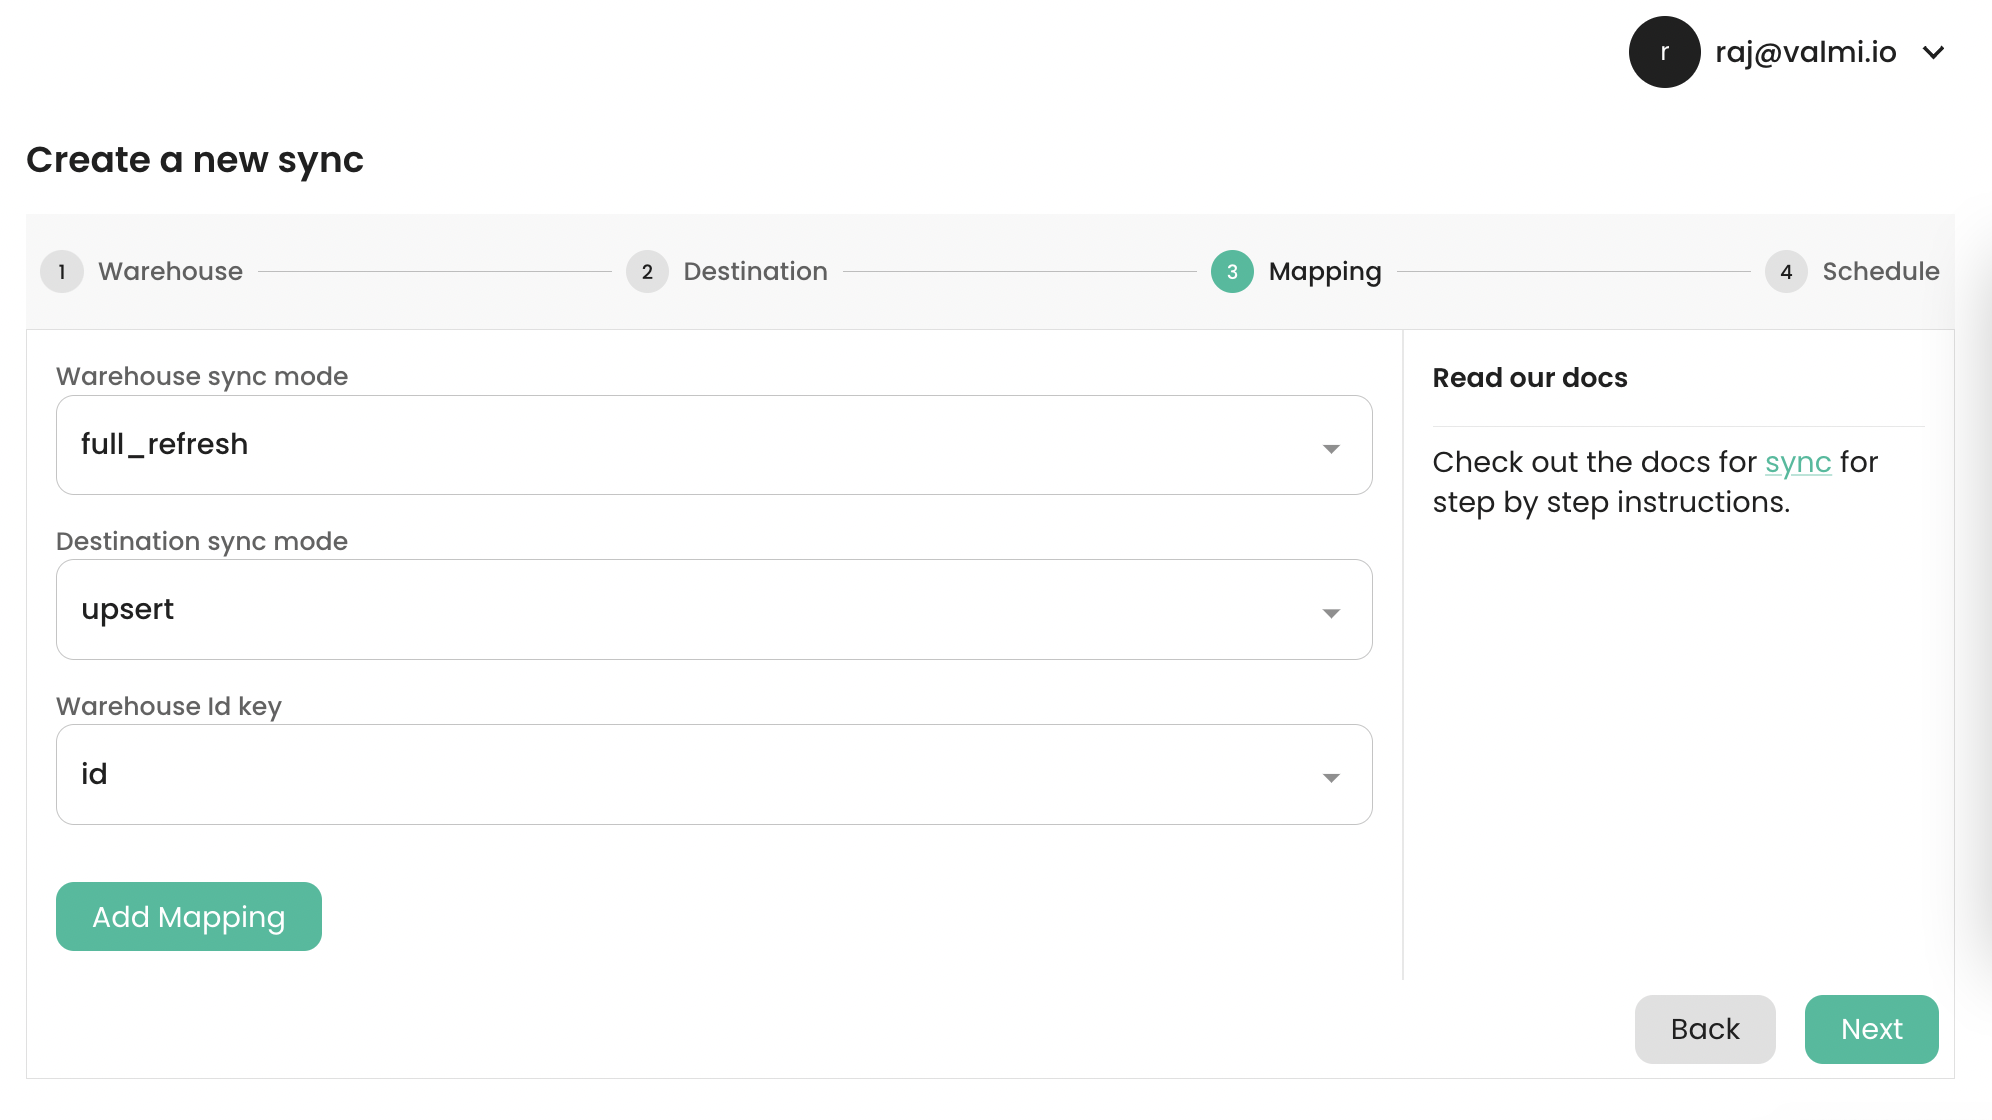
Supported Source Modes
- Full Table - This mode extracts the entire table from Postgres. This is the default mode.
- Incremental - This mode extracts only the rows that have changed since the last sync. The data to extract will be determined by comparing the current table with a snapshot of the table taken during the last sync.
-
Selecting a Primary Key
- Identifying the corresponding object in the destination. For instance, when synchronizing a Postgres table with a Salesforce object, the primary key is used to uniquely identify the Salesforce object.
- Validating and identifying rows as valid or invalid. This includes performing null checks and duplicate checks based on the primary key.