Salvage your Abandoned Carts

Imagine you have a Shopify store, and imagine it has been tough for you in business for a few months. You have seen users leaving items unattended in the cart. You see data piling up and you have considerable Abandoned Cart data in a few weeks.
You are trying to find a way to win back your customers. Various people have advised you to reach them, but how do you reach your customers? One definite way of reaching out to them is by sending personalized emails with offers, reminders of items in their cart, etc.
But how do you send those emails? Shopify doesn't offer the solution of sending emails directly. Well, this is not a single-step process; especially using spreadsheets. You’ve to make use of intermediary tools to reach the final step.
In this blog, we will take you through a series of steps on how you can connect your Shopify store with an ETL application like Airbyte and send automated emails to customers with abandoned carts using Zapier in simple and easy steps.
Consider a Shopify store with different kinds of items. Below is a snapshot of a sample Shopify store:
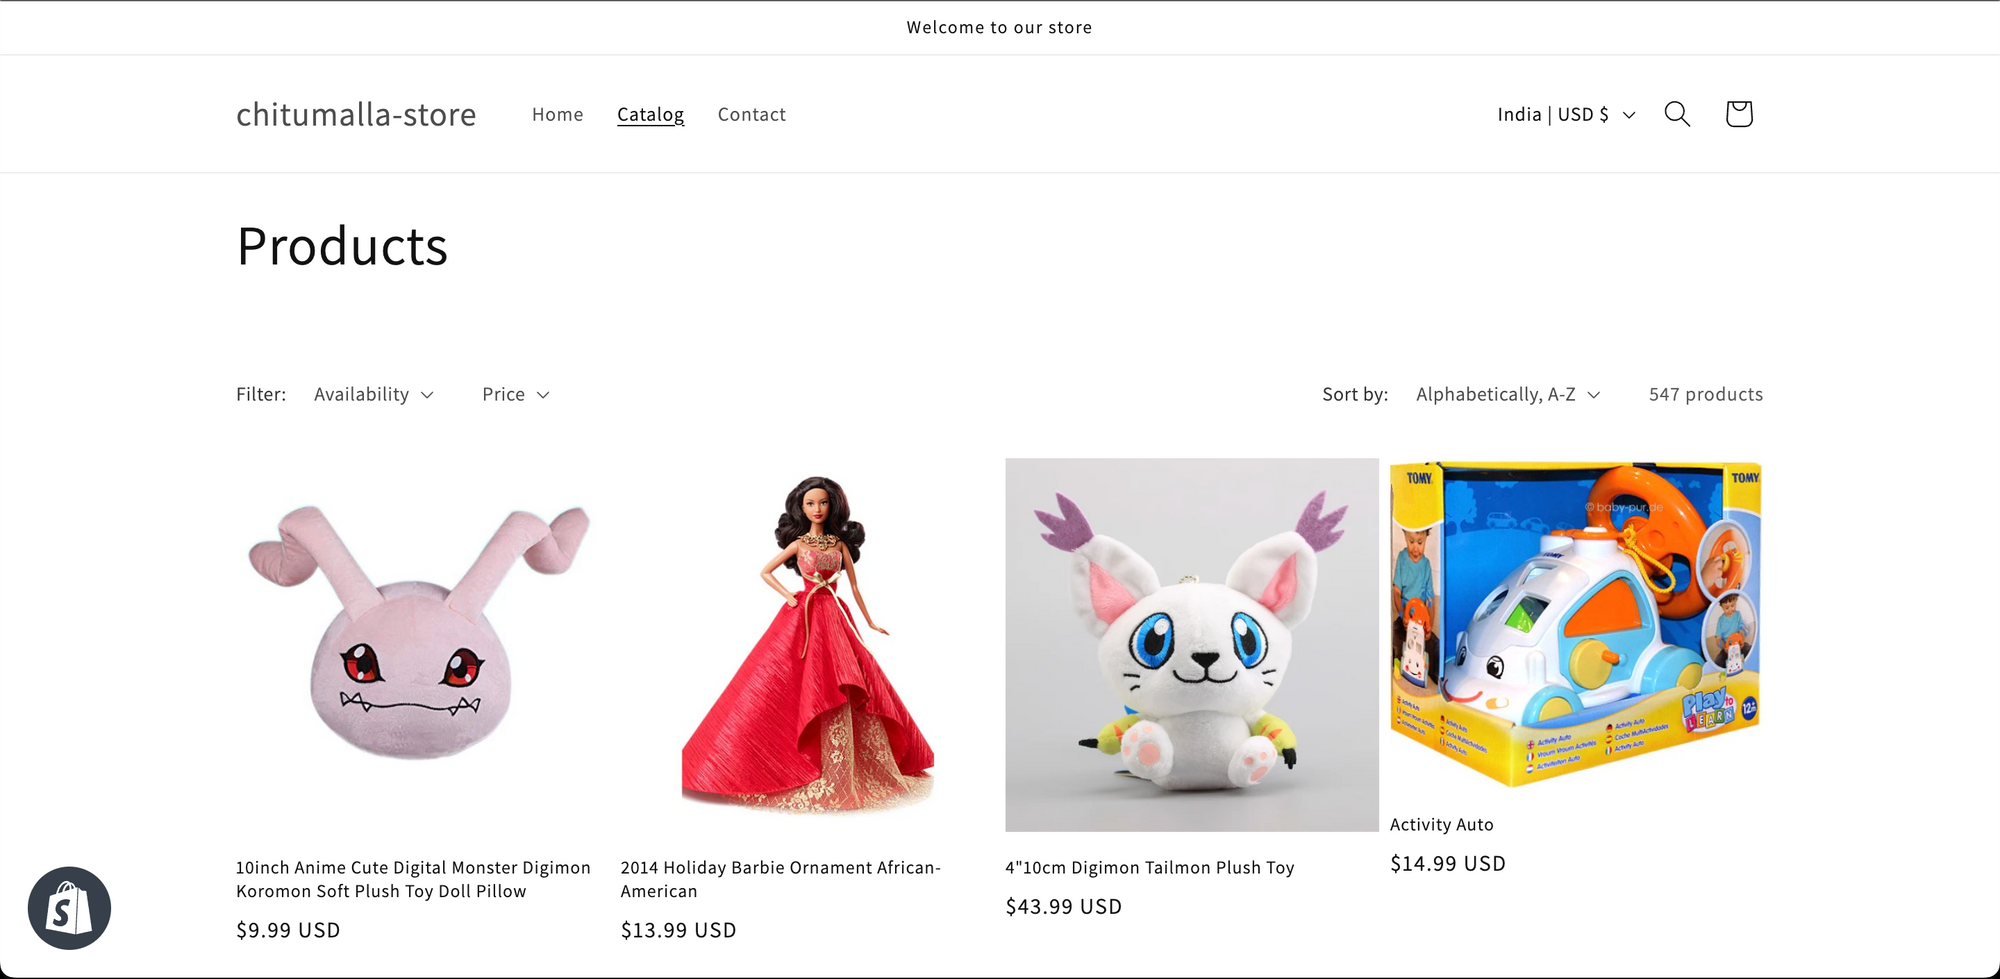
Connect your Shopify store to Google Sheets using the ETL tool
We can use any ETL tool to connect the Shopify store; in our case we are using Airbyte. It is an open-source platform designed to help businesses move and sync their data across different systems and applications. Essentially, it helps companies keep their data flowing smoothly, allowing them to make better decisions based on up-to-date information.
Below are the detailed steps:
Step 1 - Signup/Login to the ETL tool using your email address.
Step 2 - In the sources section one has to choose Shopify as your source. Enter your Store name and the URL of your store.
There are two ways to authenticate - via OAuth or API Password. You can choose either way to authenticate.
(i) Using OAuth - When you choose OAuth, you will be asked to sign it to the Shopify store. If you are not the owner of the store, make sure you get the access.
(ii) Using API Password - Visit the Shopify admin portal and click on settings. Go to "Apps and sales channels" and create an app. Name it. In the API credentials section of this app, you will find the API key.
Step 3 - Go back to the ETL application, click on the destination section, and choose Google Sheets.
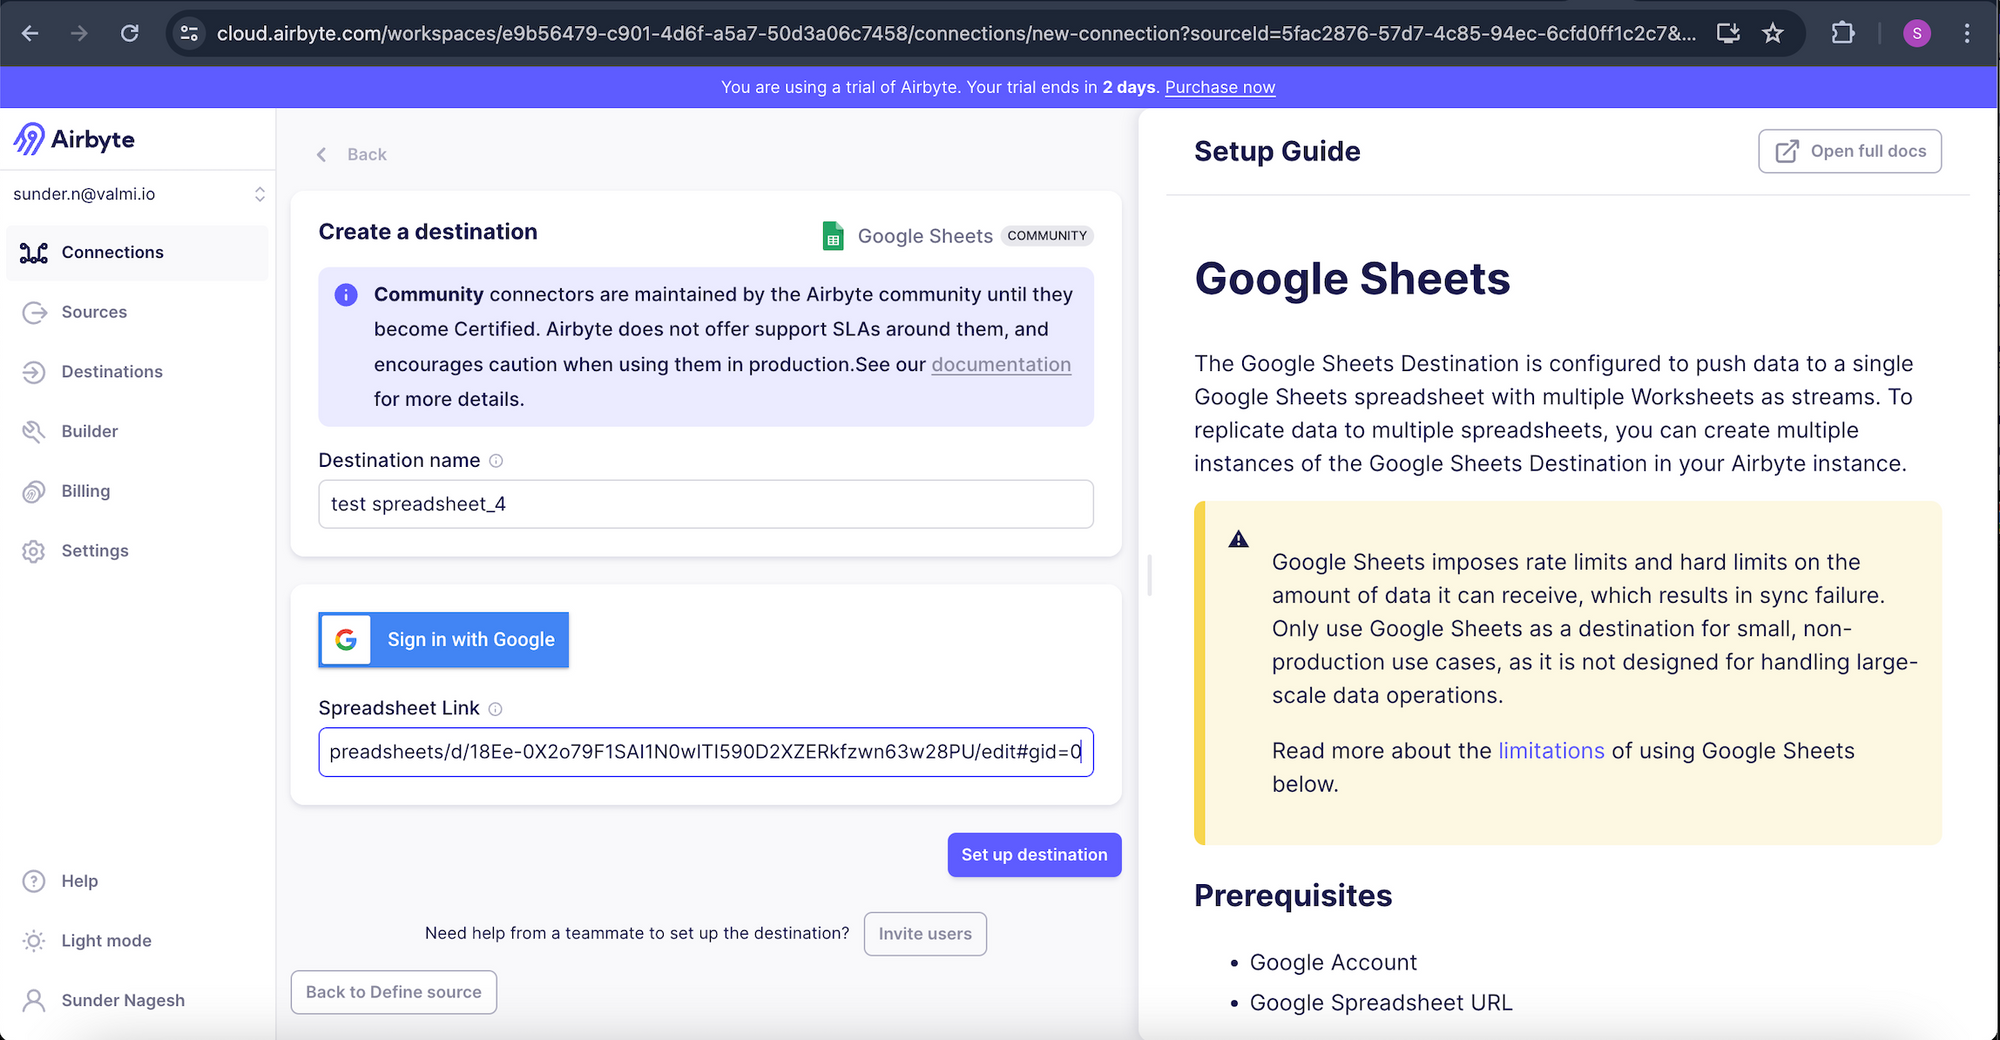
Step 4 - ETL app: Using your Gmail account, log into Google Sheets and set up your destination. During this step, give the appropriate spreadsheet link and choose the Set up destination option (as shown).
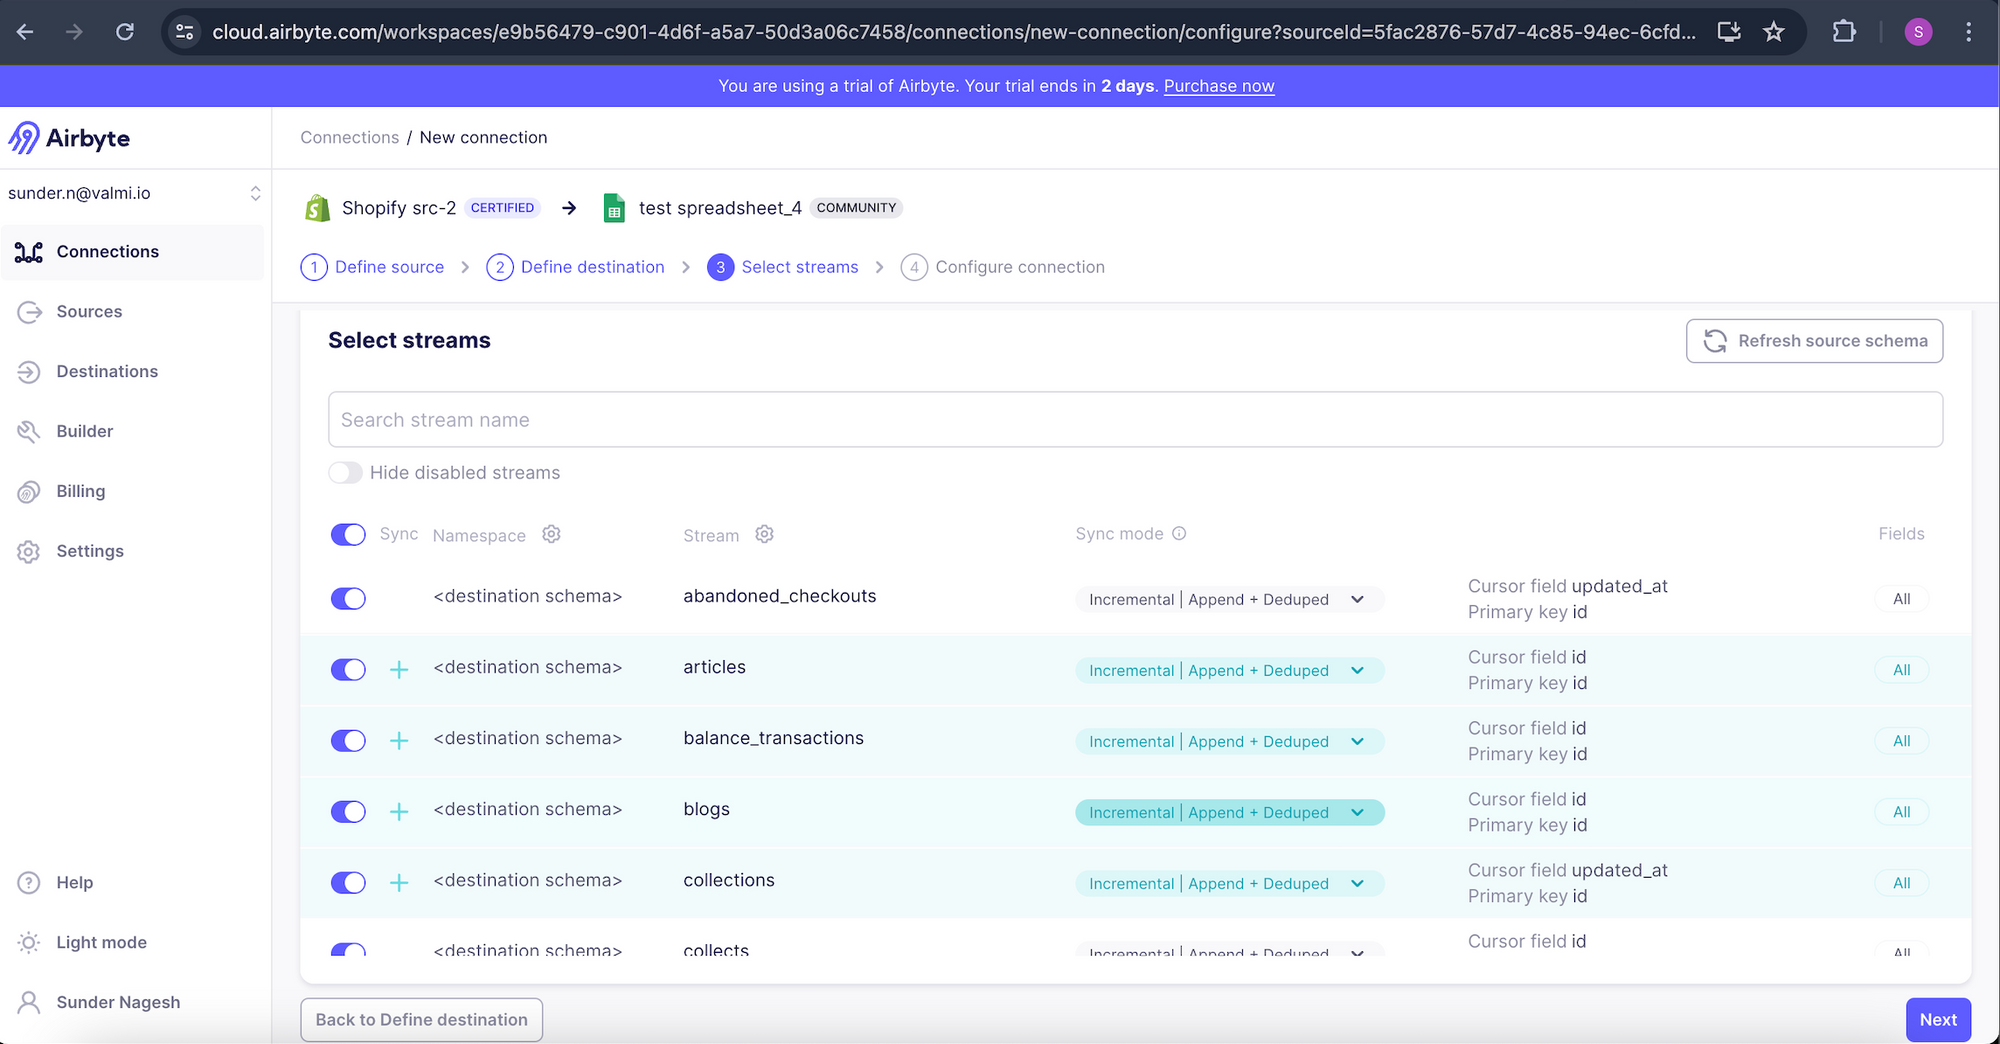
Step 5 - ETL app: Navigate to the connections section and choose your configured source (Shopify) and destination (Google Sheets) to build a connection between them (Notice the Select Streams section in the image below).
Step 6 - Configure Connection sub-section: Choose the settings you want to configure and then click the "Finish & Sync" button as shown in the image below.(i) Replication frequency - Choose the appropriate time period (in the dropdown) based on how frequently you want your data to be synced to the destination.
(ii) Destination Namespace - One has to select a namespace where you wish to store your data.
Find more details about the destination namespaces here .
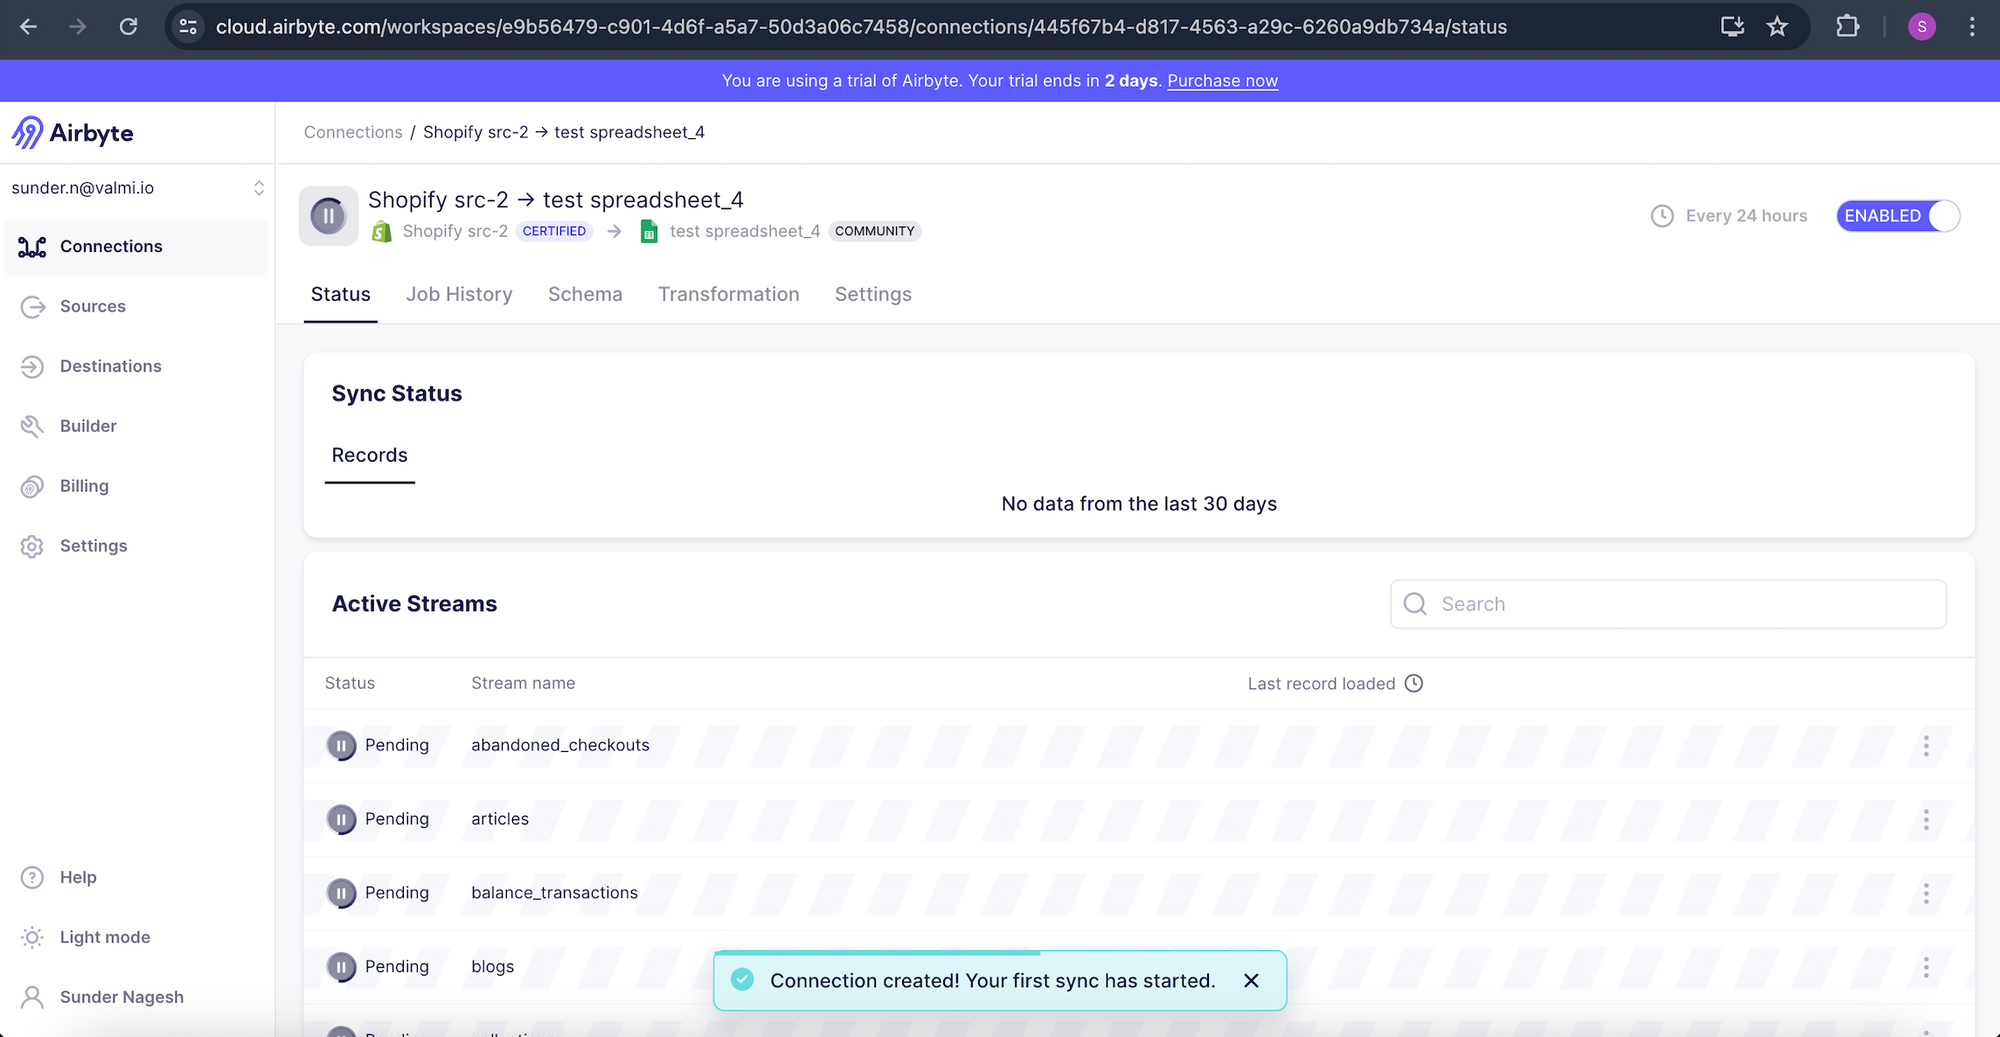
After making the above changes, choose the “Finish & Sync'' option at the bottom right. This selection indicates that the Sync has begun. After a short while, the syncing is completed as shown below.
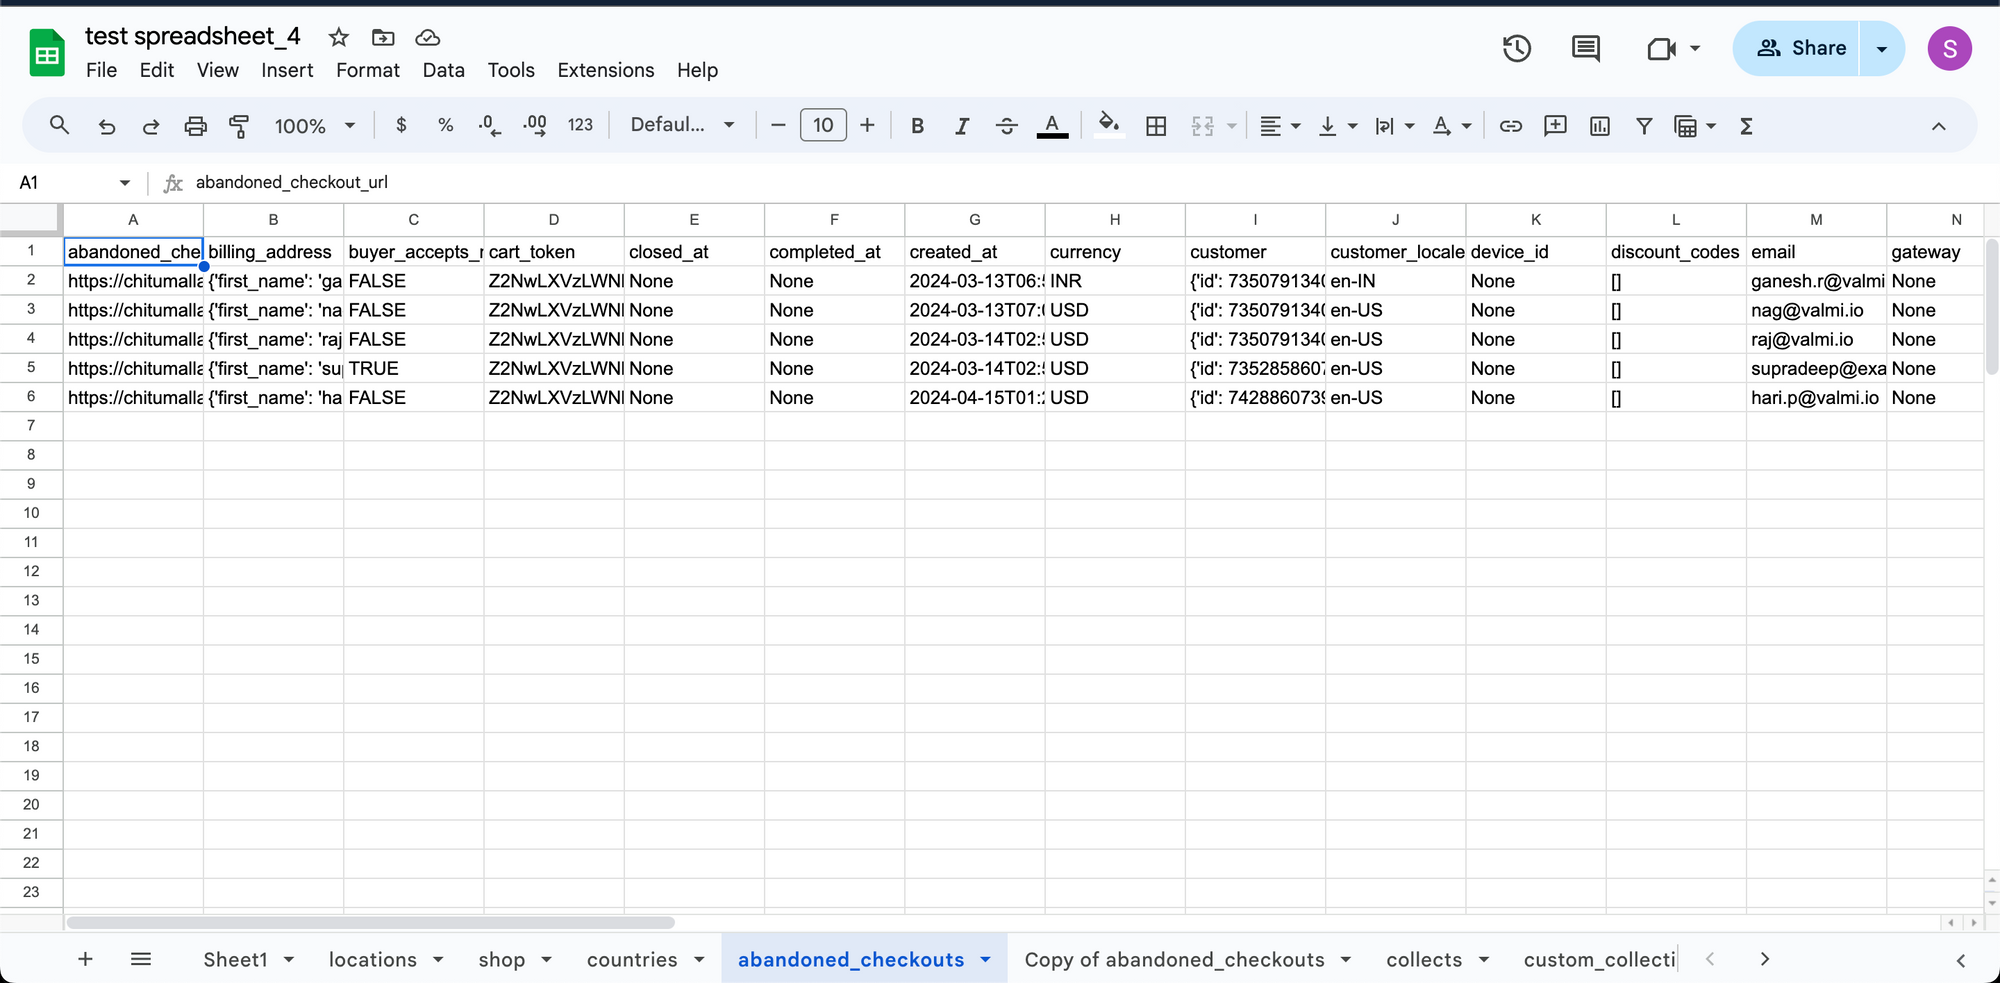
Now: go to the Google spreadsheet that you had configured earlier. You can now view the updated data in the spreadsheet after the sync is complete (as shown below).
Now, it’s time to configure your Zapier Account
Zapier is a tool that helps you automate repetitive tasks between two or more apps, with no code necessary. Customers can use Zapier to move information from one app to another automatically rather than doing so manually. “Each Zap you create starts with a trigger (something that happens in one app) and then one or more actions (this happens in another app).” For example, in our case here, the Zap can has the Google spreadsheets as the trigger and Gmail as the action(s).
Follow the steps as mentioned in the below video to send the email to Gmail accounts of the users with abandoned carts (whose information is present in the Google spreadsheet) via the Zapier platform.
Once the Zap is published, the abandoned user shall receive an email as shown here:

What are we doing at Valmi.io?
At Valmi.io, we are building an integrated eCommerce data platform centered around the Google Spreadsheets. With our product, the need for an intermediary workflow automation platforms like Zapier is eliminated. Also, there’s no need for an ETL tool as well. Users will have to configure their Shopify store on our platform and with the help of Google spreadsheets, the users can activate the downstream systems via emails or/and other modes of communication.
Look out for our product updates in the forthcoming weeks for more information on the implementation.


